
expo-IP CMS Benutzerhandbuch
Für die Nutzung des expo-IP CMS benötigen Sie einen beliebigen aktuellen Browser, der fehlerfrei den aktuellen HTML5 Standard unterstützt. Hierzu zählt NICHT der Browser: Microsoft INTERNET EXPLORER.Messe Grundeinstellungen
- Cookies der expo-IP
- Medienformate
- Einführung für Veranstalter
- Settings
- Eingang
- Favicon setzen
- Texte
- Cookies Consent
- Datenschutzeinstellungen
- Menü erstellen
- Halle anlegen
- Stand erstellen
- Benutzer / Aussteller
- PreviewLink
- Registrierungsformular
- CustomFields
- Registrierungsprozess
- Broadcast nutzen
- Messenger nutzen
- 123.chat aktivieren
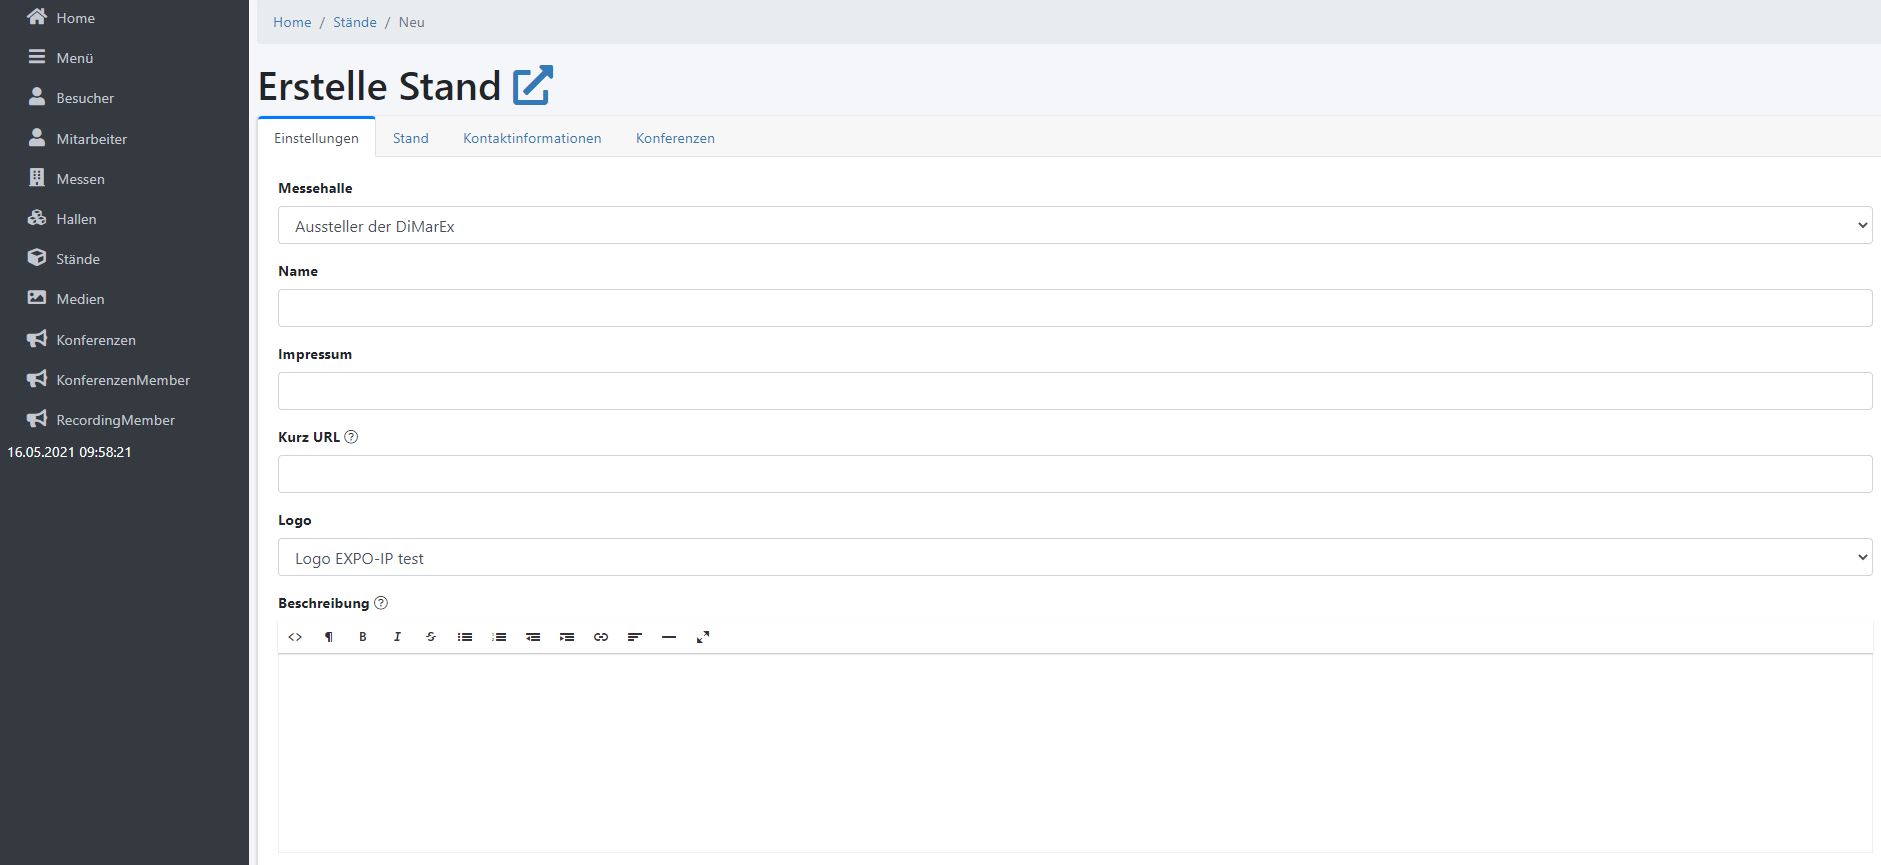
Stand erstellen
Um einen Messestand zu erstellen, wählen im linken Menü die Option „Stände“ – dort den Button „Stand erstellen“

Deutsch

Englisch
Eingabemaske ausfüllen
Um einen Stand erstellen zu können, müssen mindestens die Felder Name und Impressum gefüllt sein.
Deutsch

Englisch
Deutsch
Englisch
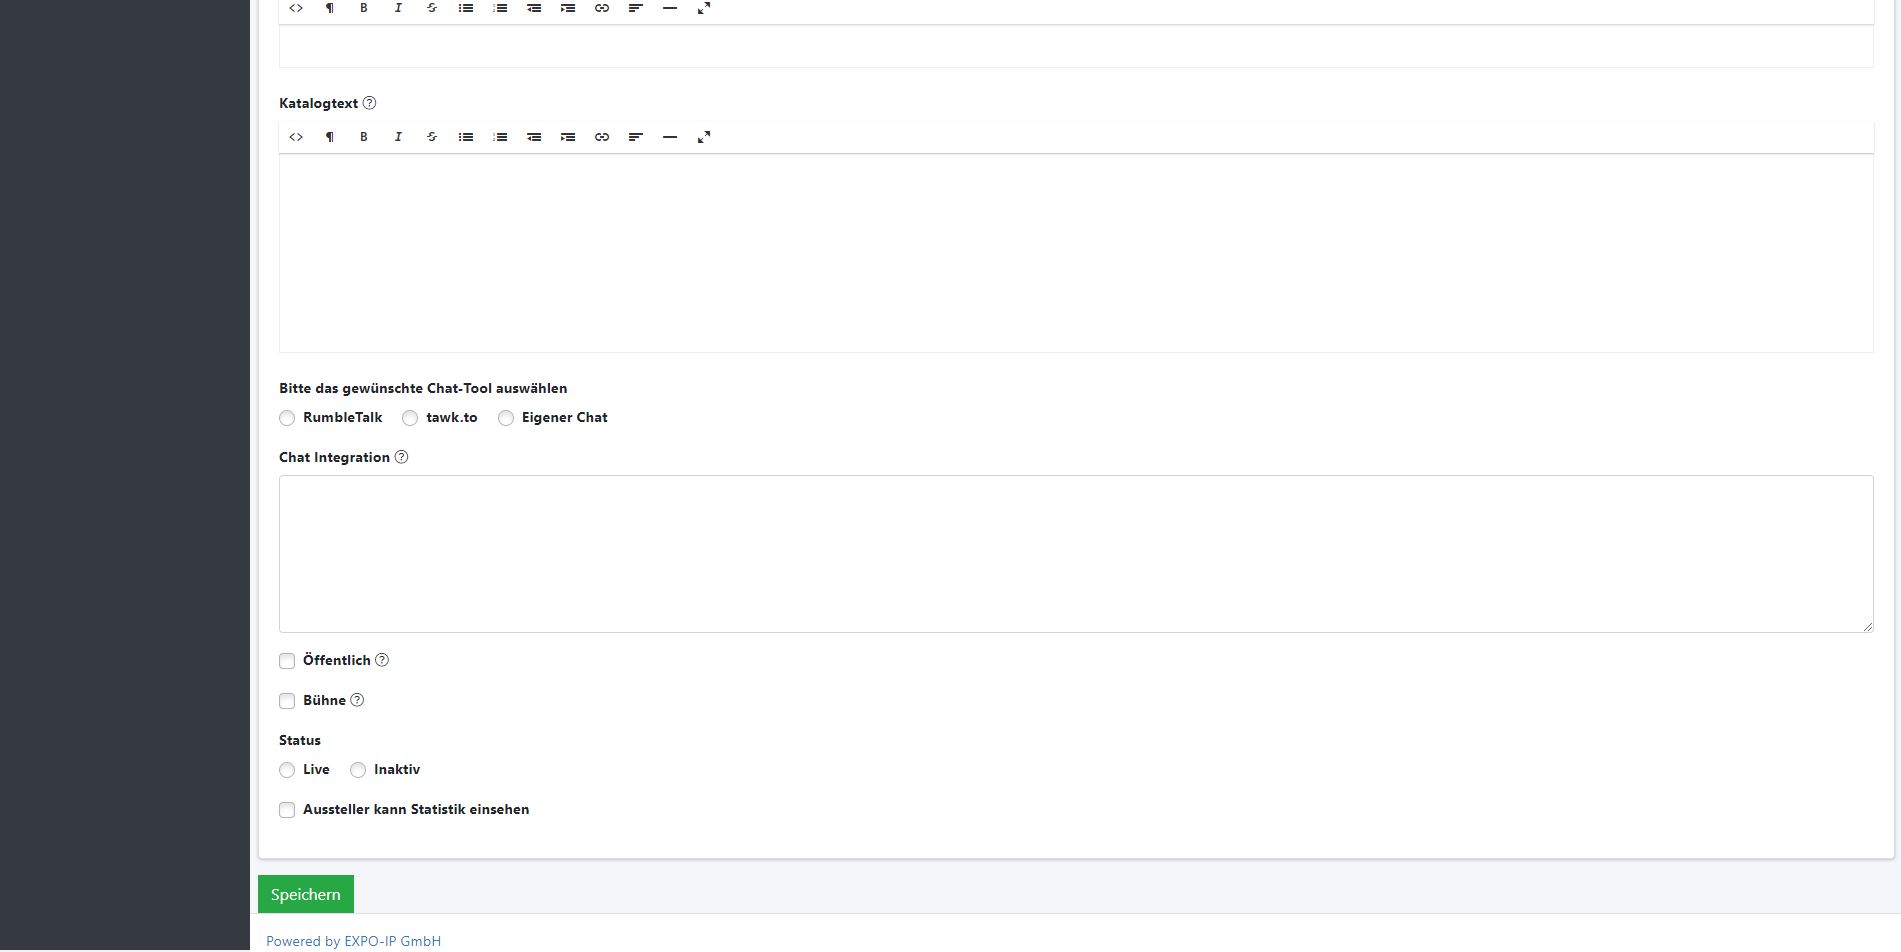
Sichtbarkeit und Status einstellen (Öffentlich / Bühne / Status)
Bei einem Stand sollten grundsätzliche die Optionen „Öffentlich“ und „Live“ selektiert werden.
Öffentlich ist NICHT selektiert
Wird „Öffentlich“ nicht selektiert, wird der Stand nicht in der Aussteller-Liste gelistet – kann aber durch die Suchfunktion dennoch aufgerufen werden. Die Standard Navigations-Buttons (Pfeile rechts/links), die zum vorherigen bzw. nächsten Stand führen, werden jedoch ausgeblendet.
Bühne selektiert
Wird ein Stand als „Bühne“ gekennzeichnet, erscheint der Stand
- NICHT in der Aussteller-Liste und
- kann NICHT durch die Suchfunktion gefunden werden.
Die Standard Navigations-Buttons (Pfeile rechts/links), die zum vorherigen bzw. nächsten Stand führen, werden ausgeblendet.
Live
Der Stand ist grundsätzlich aufrufbar.
Inaktiv
Der Stand ist grundsätzlich nicht aufrufbar, ein Link zum Stand wird einen Fehler 404 ausweisen
Aussteller kann Statistik einsehen
Mit dieser Option wird es dem Aussteller ermöglicht, die Besucher-Statistik seines Stands einzusehen und die Daten zu exportieren. Per Default ist diese Option nicht gesetzt.
Eingabemaske speichern
Nach dem Speichern ist der virtuelle Messestand eingerichtet und kann, gemäß der Beschreibungen in der Aussteller-Dokumentation, angepasst werden.